I finally found it! My favorite gluten free brownie bite! Also-I weigh my gluten free flour since measuring tends to get too much due to the texture differences. I have tried a number of others but this one is the bomb!
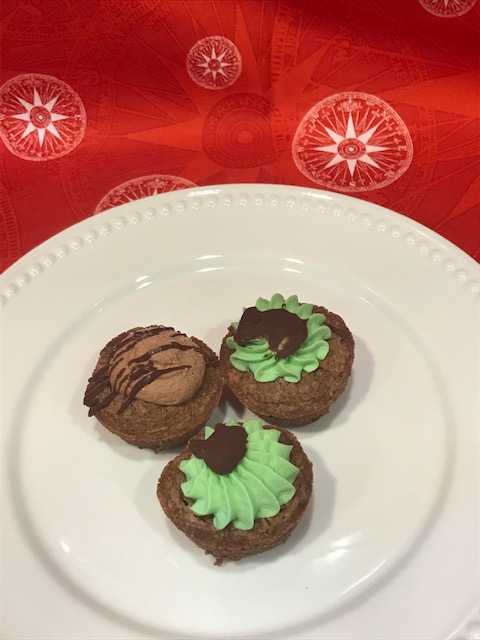
I shared a few with my hubby’s co-worker and she had no idea they were gluten free! My hubby, who is normally very sensitive and NOT impressed with gluten free, thought they were fantastic! They tried the ones with chocolate buttercream and loved them. I also made with mint buttercream because THOSE are my favorites! Here is the original brownie bite post with the mint buttercream but I also added it here. Those original bites are not my favorite though.
I started with this recipe from Kitchen cents and modified it slightly. Next time I will try to start substituting some of the butter with applesauce (my mom can’t do much oil).
Note-I did try this recipe subbing half of the butter for applause and it worked great!! Didn’t change the texture nor taste!
Note 2-When I say cool completely, I mean it. After they are mostly cooled, I often even put in the fridge/freezer (or when it’s -10 here I put outside for a bit) to make sure they are cooled through before I try to remove them.
Gluten Free Brownie Bites
A perfect blend of fudgy, but not gooey and chocolatey brownie bite.
Also note-I weigh my gluten free flour since measuring tends to get too much due to the texture differences but will give the measurements.
This chocolate buttercream recipe makes a BIG batch. We love to put the extra between 2 saltine crackers.
Ingredients
3/4 cup butter-melted
1/2 cup cocoa powder
1 1/2 cups granulated sugar
2 tsp vanilla
3 eggs
1/2 tsp salt
1/2 tsp baking powder
160 g gluten free flour
1/2 tsp Xanthan Gum (omit if your flour contains already)
1/2 cups mini chocolate chips
Chocolate Buttercream
1 1/2 cups butter, softened
480 g (or 4 cups) powdered sugar
3/4 cups cocoa powder
3-4 Tbsp heaving cream or heavy whipping cream
2 tsp vanilla
pinch salt
Mint Frosting
1/2 cup butter, softened
1 1/2 cups confectioners or powdered sugar
1/4-1/2 tsp mint extract (we use a tad more than 1/2 tsp because we like it minty!)
1-2 Tbsp heavy cream or milk
2-4 drops green food coloring
1/3 cup chocolate chips + coconut oil or butter for thinning
Directions
1. Preheat oven to 350°F and lightly grease or spray mini cupcake tin (I used my silicone molds and they worked great!-if using a metal tin make sure to spray AND flour)
2. Mix butter, cocoa powder, and sugar together.
3. Add vanilla and eggs-mix well
4. Add flour, salt, and baking powder-mix until incorporated. Don’t over mix.
5. Stir in mini chocolate chips (you could skip but it’s more chocolate so…..why??)
6. Scoop 1 Tbsp (this is my small cookie scoop) into each tin.
7. Bake 14-16 minutes or until middle is set and toothpick comes out clean. (In my oven it is actually closer to 18-20 minutes)
8. Let cool 3-5 minutes and push a measuring spoon (my 1/2 tsp spoon is perfect!), the small end of rolling pin, or other object in center to make a ‘well’. (don’t push through the bottom)
9. Let cups cool completely. Remove from pan. (believe me they won’t come out well if you don’t cool them completely)
10. Fill with desired filling=mine was chocolate buttercream below.
Chocolate Buttercream
1. Beat butter on medium speed for 3-5 minutes until creamy and light colored. (I like to use my whisk attachment).
2. Sift the powdered sugar and cocoa powder into bowl (I use a sieve).
3. Stir SLOWLY to avoid the ‘poof’ of powdered sugar.
4. Add 3 Tbsp of Heavy cream, salt, and vanilla. Whisk to incorporate. NOTE: If it’s still too thick/stiff add the remaining table spoon of cream.
5. Turn to medium and beat for about 10 minutes until light and fluffy.
6. Put into a piping bag and pipe into brownie cups.
Mint Buttercream-
1. Beat butter until cream and light colored
2. Add powdered sugar and mix slowly.
3. While mixing add mint extract.
4. Add cream or milk a little bit at a time until it reaches the consistency you want.
5. Add green food coloring.
6. Pipe into Brownie cups.

