Gluten Free Krumkake
My family is such a mixture of ethnic backgrounds we didn’t have any ethnic foods when I grew up. Cue my DH’s family who is about 3/4 Norwegian and 1/4 German who have a number of ‘ethnic’ foods at their holiday celebrations. Even though my small mid-western area is brimming with Norwegian heritage, it is something my family never took to. However, I have to learn to change. My DH’s family loves lefse and krumkake around the holidays. Now, lefse I am not a huge fan of eating but I enjoy making it! My DH and kids love it too so I make it. That is one item I need to tackle making gluten free yet.
One of the items they introduced my palette to was Krumkake. It’s a crispy, sweet, light cookie. They traditionally have it with frozen, sweetened strawberries. My DH crumbles his into the strawberries and eats it. I prefer NOT having a soggy cookie and simply dip the cookie, it also gives me more of the flavor. YUM! I have always shied away from making is as it takes a special iron and then you roll it warm. It intimidated me some. I finally asked for a Krumkake iron for my birthday (I got this one from Chef’s Choice but I see it’s discontinued) and decided I was going to do this! My mother-in-law was gracious enough to share their recipe. My first try with this recipe (I jumped in head first and went GF right away) and it went great! I was so proud!!
Gluten Free Krumkake
A light, slightly sweet, crunchy cookie perfect for the holidays!
This came from my mother-in-law who has been making it with her family for years. I halved the recipe and made it Gluten Free.
Ingredients
-1/2 cup sugar
-1/2 cup melted butter (cooled)
-6 Tbsp milk
-4.2 oz gluten Free flour -sifted (I used my Favorite mix)
-1/4 tsp Xanthan Gum
-1/2 tsp baking powder
-1 egg, beaten
Directions
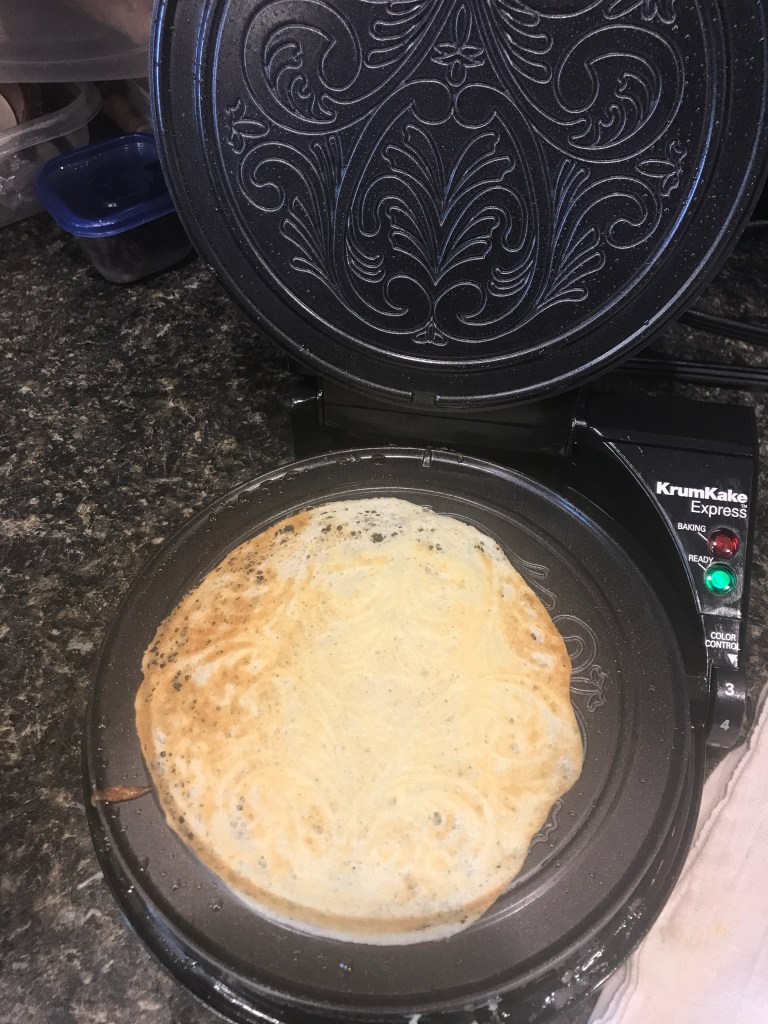
1. Pre-heat Krumkake iron ( I turned mine to 3)
2. Melt butter and cool (so you don’t cook the egg)
3. Whisk all ingredients together
4. Note: Batter should be similar consistency to cake batter. If too thick, add a little milk to thin. I added approximately 1 tsp more to thin a bit.
4. Spray iron lightly with cooking spray or brush lightly with oil to prevent sticking.
5. Put 1 Tbsp batter in the middle and spread slightly. Lower lid to start cooking (I found I didn’t want to ‘lock’ mine immediately as it lead to little holes, which I didn’t like). About half way- three-quarters of the way through cooking I lowered lid all the way and locked.
6. When Cookie is ‘done’ to your preferred color, use a rubber spatula to put down on a flour sack towel
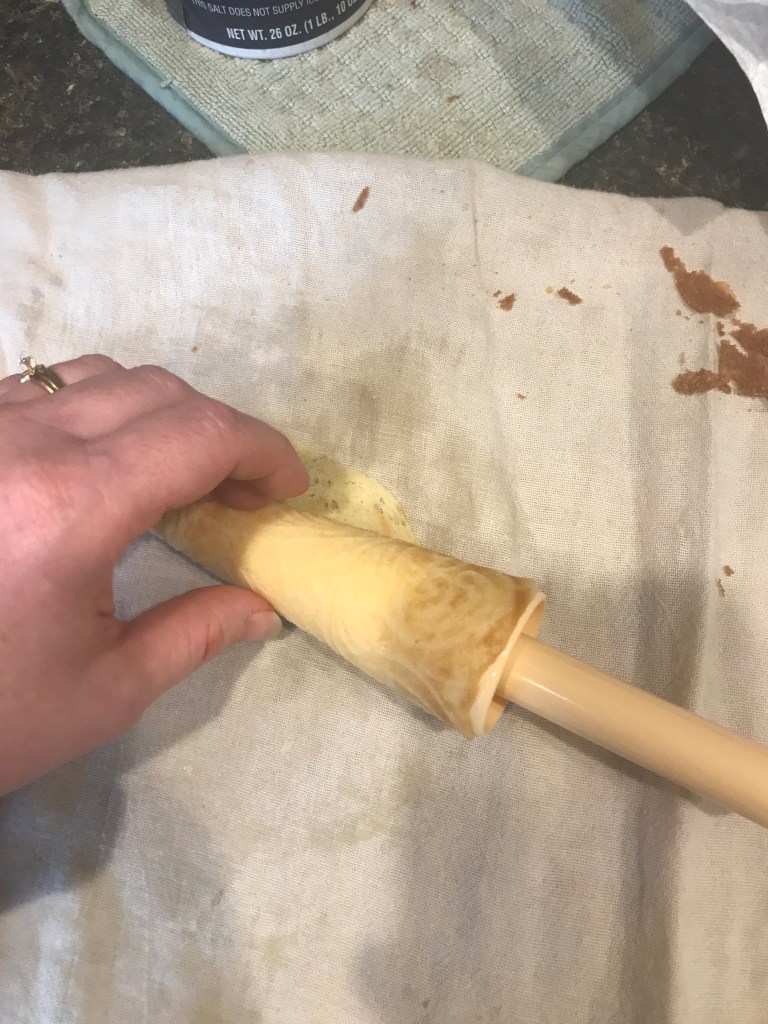
7. Using a cone, place cone 3/4 way onto cookie and start rolling.
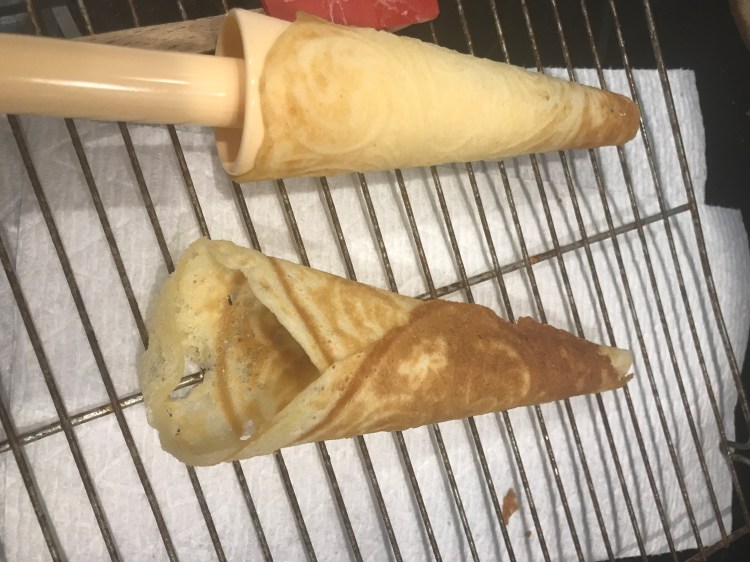
8. Place rolled cookie (IN cone) on a wire rack to cool, while you start another cookie
9. Continue until all batter is used.
10. Enjoy with whipping cream, fruit, or savory ingredients if you choose.

