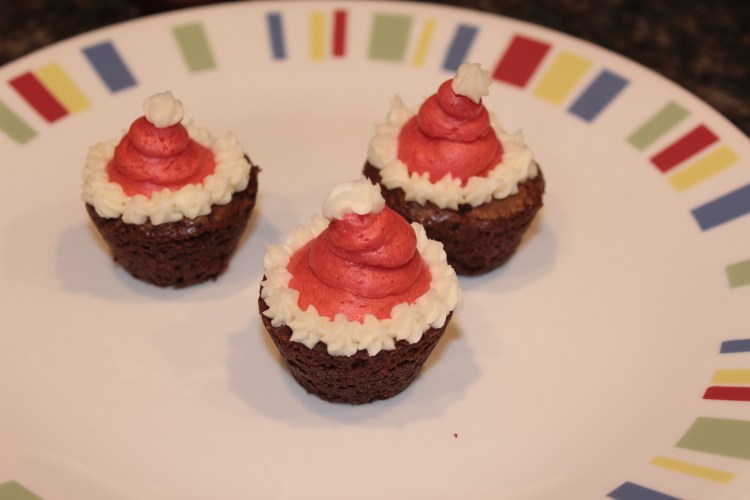
Gluten Free Santa Hat Brownie Bites
I started with a recipe from Beyond The Butter and tweaked it to make it Gluten Free. Again I used the flour mix from Flippin Delicious and processed it in my food processor to help combat the graininess of Bob’s Redmill’s flours. I am an OVER researcher and in this research I found many people who say there is no such thing as cup for cup flour baking. They recommend that you should measure out your flour using 4.3 oz=1 cup of flour. I also edited it and used semi sweet as my family likes semi more than dark. Then I threw in some Mini Chocolate chips because…why not!?
I will say I had a little bit of a failure at first!! I tried using my middle sized cookie scoop which is 1.5-2 TBSP and I made them in my silicone mini cupcake pan. That was a bad idea! They puffed up way over the top of the pan then deflated giving them crusty tops mushed together. When I pulled them out, I let them cool about 10 minutes and they were slightly warm. I tried popping them out but the tops fell off. I realized they weren’t coming out so I just flipped the WHOLE thing onto a cookie sheet and tried to get them out. The tops came off of those too. Leaving me with a mess! However, in sampling them I really liked the flavor of them. They were maybe a TAD sweet but over all good chocolatey and fudgy which is what I was going for.
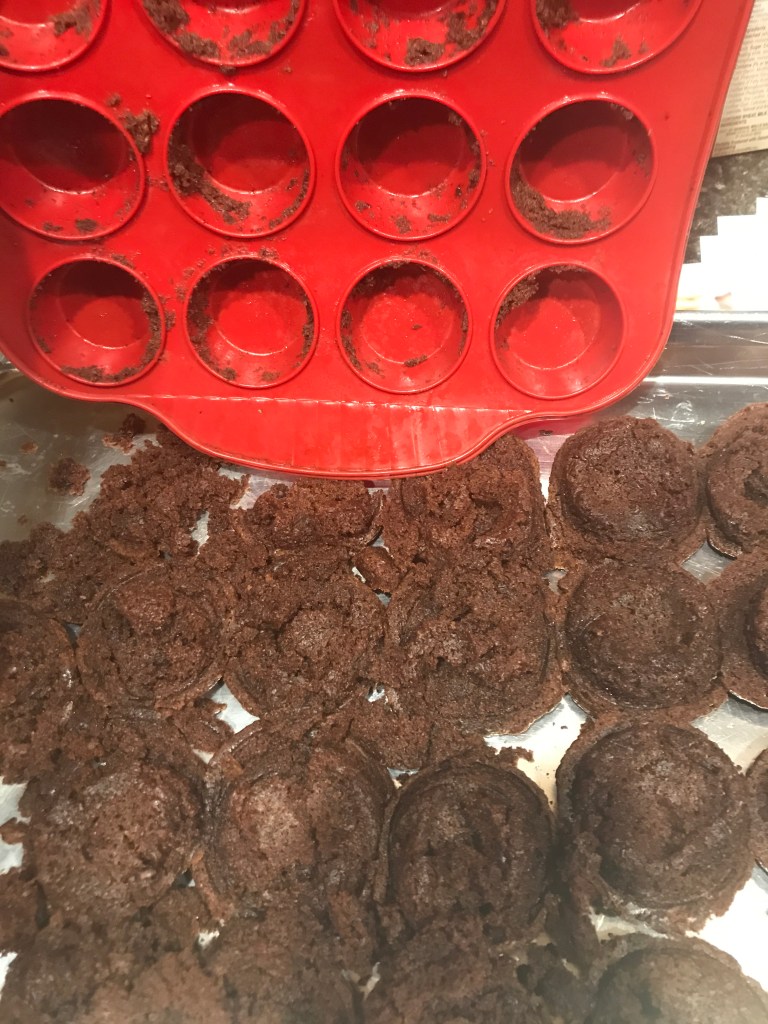
After that I made them in a well sprayed muffin TIN pan and with my SMALL cookie scoop. Using the small scoop worked better. I waited the 10 minutes and used a knife to try to pop them out and again, ended up with a separated bottom. So, I decided to let the pan totally cool and even tossed it in the fridge for a bit. I got out my knife and loosened one side then went to the other and SUCCESS! They came out! If I didn’t need them for something I would have tried my silicone pan again ensuring they were completely cooled before attempting to remove. I am always worried I am going to scratch my pan when I use a butter knife to pry things out.
I then used my favorite butter cream from SavorySweetLife.
Gluten Free Santa Hat Brownie Bites
A chocolatey, fudgy brownie bite that looks like Christmas!
Altered from: Beyond the butter
Ingredients
Bites
-4.3 oz Gluten Free Flour Blend (I used Flippin Delicious)
-1/2 tsp salt
-1/2 tsp baking powder
-1/2 cup Unsweetened Cocoa
-1/4 cup Butter, softened
-1/4 cup Vegetable oil
-1 1/2 cups granulated sugar
-3 large Eggs, whisked slightly
-2 tsp Vanilla Extract
-4 oz Semi Sweet Chocolate
-1/2 cup mini chocolate Chips
Buttercream
Credit: Savory Sweet Life
-1 cup unsalted butter (2 sticks or ½ pound), softened
-3-4 cups confectioners (powdered) sugar, SIFTED
-¼ teaspoon table salt
-1 tablespoon vanilla extract
-Up to 4 tablespoons heavy cream, half and half, or milk **heavy cream is best
-Red Food coloring
Directions
1. GENEROUSLY spray mini cupcake/muffin pan (original recipe suggests flour based-I wish I would have tried that!!)
2. Preheat oven to 325°F
3. Melt semi sweet chocolate over double boiler until smooth or melt in microwave 30 seconds at a time stirring well between each time until melted. Set aside to cool slightly
4. In a medium bowl, whisk flour, salt, baking powder, and cocoa together. Set aside.
5. In your mixer, beat butter, oil, and sugar until light and fluffy.
6. Add eggs and vanilla extract.
7. Mix in melted chocolate ensuring you add while mixing to avoid scrambled eggs in-case chocolate is a little warm yet.
8. With mixer on low, add dry ingredients a little at a time just until blended into wet.
9. Fold in mini chocolate chips
10. Using 1 tbsp cookie scoop, place brownie mix into brownie cups.
11. Bake 12-15 minutes or until a toothpick inserted into the center comes out with a few moist crumbs on it but not batter.
12. Remove from oven and allow to cool COMPLETELY before attempting to remove from muffin cups. You could pop into the refrigerator to help cool quicker if need be.
Butter Cream
1. Beat softened butter 4-5 minutes until very light colored and creamy (I use the whisk attachment). Scrape sides a few times.
2. Add in 3 cups of powdered sugar and turn on LOW to mix butter and sugar a bit.
3. Mix in salt and vanilla.
4. Add heavy cream (or milk) a little at a time until it is at the consistency you want.
5. To decorate muffin cups like Santa hats, remove half of the buttercream to a pastry bag fitted with a smaller open start tip. I used a Wilton 18 tip.
6. Add red food coloring to the other half of buttercream in mixing bowl to achieve the shade you want. Place in a pastry bag with a round tip, I believe I used a Wilton 10 tip.
7. Pipe on ‘blobs’ of red pulling to a small point on top.
8. Pipe on a ring of the ‘stars’ then a star on the tip.

